
There’s something about stepping into your backyard on a warm Gilbert evening and realizing it actually feels like an extension of your home, not just a patch of dirt waiting for weeds. It’s that feeling of pride when you look at a crisp stone edge or a pathway you laid with your own hands. You don’t always need a massive budget or a full construction crew to make a significant dent in your curb appeal.
Contents
So, Why Hardscaping?
Honestly, planting flowers is great. I love a good cactus or a blooming bougainvillea as much as the next person, but plants are needy. They need water—a lot of it, especially here in the valley—and they need constant trimming. Hardscaping, on the other hand, is the backbone of your garden. It’s the stuff that stays put.
Think of it this way: if landscaping is the paint and furniture of a room, hardscaping is the walls and the floor. It gives the space structure. Plus, once you lay a paver walkway or set up a stone border, you don’t have to water it. That’s a huge win in our climate.
You might be thinking, “I’m not a mason, I can’t pour concrete.” You know what? You don’t have to be. There are plenty of projects that just require a shovel, a level, some sweat, and maybe a weekend or two. It’s about picking the battles you can win.
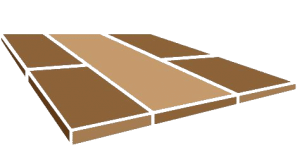
Project 1: The Weekend Walkway
Let’s start with something that looks impressive but is surprisingly forgiving: a stepping stone path. If you have a side yard where the Grass refuses to grow, or a path from the patio to the pool equipment that turns into a mud pit during monsoon season, this is for you.
Here’s the thing about this project—it doesn’t have to be perfect. In fact, a little irregularity makes it look more organic and high-end.
What you’ll need:
- Large flagstone pieces or large format pavers
- Sand or stone dust
- A shovel
- A rubber mallet
How to tackle it
You aren’t trying to build a Roman road here. You just want a stable surface to walk on. Lay your stones out on the ground exactly where you want them. Walk on them. Do they feel too far apart? Move them closer. Once you like the layout, use your shovel to cut the outline of the stone into the dirt.
Move the stone, dig down about two or three inches, and toss in a layer of sand. This is the secret sauce. The sand allows you to wiggle the stone until it sits flat. If you just put stone on Arizona hardpan dirt, it’s going to wobble every time you step on it, and that’s annoying.
Drop the stone back in, pound it with the mallet until it’s flush with the ground, and move to the next one. Fill the gaps with decorative gravel or just let the grass (or weeds, let’s be real) grow between them. It’s simple, effective, and creates an immediate visual improvement.
Project 2: Defining Your Edges
Have you ever noticed that a messy lawn looks ten times better if it just has a crisp edge? It’s like getting a haircut; even if the top is messy, clean sides make you look put together. Installing garden edging is one of the highest-impact projects you can do yourself.
It separates the “living” part of your garden from the hardscape elements or the rock mulch. Without it, your gravel migrates into your grass, and your grass creeps into your flower beds. It’s a mess.
Here is a quick look at materials you might find at a local supply yard:
| Material Type | Difficulty Level | Durability | Best For |
|---|---|---|---|
| Concrete Pavers | Moderate | High | heavy-traffic areas, clean lines |
| Natural Stone | Moderate/High | Very High | Rustic, desert-style landscapes |
| Plastic/Metal | Low | Low/Medium | Hidden barriers, budget fixes |
I’d stay away from the cheap plastic edging if you can help it. The sun here bakes it brittle in about two summers, and then you’re just pulling distinct shards of black plastic out of the ground. Go for concrete bullet pavers or brick. They handle the heat and look intentional.
A Quick Side Note on Drainage
Before we get into the bigger stuff, I have to mention something that sounds boring but matters. Water. When you are adding hard surfaces to your yard, you have to think about where the rain goes. I know, it rarely rains in Gilbert, but when it does, it pours.
If you block the natural flow of water away from your house with a new garden wall or a path, you could end up with a flooded patio. Just keep a slight slope away from your foundation. Always.
Project 3: The Gravel Fire Pit Area
This is probably the most popular DIY project right now. Everyone wants a fire pit, but pouring a concrete slab is heavy, expensive work that usually requires a pro to get the finish right.
The workaround? A crushed granite (DG) or gravel pad.
It fits perfectly with the Gilbert aesthetic. It’s rustic, permeable (so water drains through it), and you can do it with a wheelbarrow and a rake.
- Mark your circle or square. Use a garden hose to create the shape on the ground.
- Excavate. Dig out the sod or top layer of dirt about 3 to 4 inches down.
- Lay landscape fabric. This is controversial, but in a rock area, it helps keep your rocks from sinking into the mud over time.
- Add the base. Put in a layer of larger crushed rock, then top it with your decorative gravel or Decomposed Granite.
- Compact it. This is the step people skip. Rent a plate compactor or use a hand tamper. If you don’t compact it, it feels like walking on sand at the beach—exhausting and messy.
Once the pad is done, you just place a portable fire bowl in the center and arrange some Adirondack chairs. You’ve just created a destinational living space for the cost of a few tons of rock and a weekend of cardio.
Project 4: The Paver Planter Box
If you have tried gardening in our native soil, you know it’s basically like trying to farm on a concrete slab. The clay is dense, alkaline, and hard to work with. Raised garden beds are the answer, and building them out of tumbled pavers or wall blocks is a fantastic weekend project.
You don’t even need mortar for many of these systems. Most Retaining Wall blocks available at home improvement stores are designed with a “lip” on the back that locks them into the row below.
The process is straightforward:
Dig a shallow trench for the first row (the base course). This row must be perfectly level. I mean it. If the bottom row is crooked, by the time you stack three rows up, it’ll look like the Leaning Tower of Pisa. Use a long level and take your time.
Once the first row is buried about halfway and leveled, you just stack the rest. Glue the top cap stones down with a construction adhesive made for masonry. Fill it with good potting soil, and suddenly you’re growing tomatoes in Gilbert without fighting a shovel into the caliche clay.
When DIY Becomes “Oh No”
Look, I’m all for getting your hands dirty. It’s rewarding. But there is a line where a project crosses from “fun weekend challenge” to “back-breaking nightmare.”
You might start a project thinking, “I’ll just lay a small paver patio.” Then you realize you need to excavate six inches of soil across a 400-square-foot area. That is tons of dirt. Literally. Then you have to haul in tons of base material. Then you have to screed the sand so it’s perfectly flat (which is an art form in itself).
If the ground isn’t compacted correctly—and I mean using industrial machinery, not just stomping on it—the pavers will settle. You’ll end up with dips and puddles within six months. Uneven pavers are a massive trip hazard, and fixing them usually means ripping the whole thing up and starting over.
Also, cutting pavers requires a wet saw or a specialized splitter. It’s loud, dusty, and can be dangerous if you aren’t comfortable with the tools.
Materials Matter
A quick tip on buying stuff: The big box stores are fine for small repairs, but for a real project, visit a local landscape supply yard in the East Valley. You’ll get better pricing on bulk materials like river rock, paver sand, and flagstone. plus, the rock there matches the local geology better than the bagged stuff that gets shipped in from halfway across the country.
When you buy local, you get colors that blend with the desert landscape naturally—golds, tans, and reddish hues that look right at home against a stucco wall.
Let’s Create Something Lasting
Tackling these smaller projects is a great way to dip your toes into hardscaping. It builds confidence and makes your yard more usable immediately. But if you look at your yard and see a vision that’s bigger than a weekend warrior project—like a full pool deck remodel, a precision-leveled paver Driveway, or a complex retaining wall system—that is where we come in.
We handle the heavy lifting, the laser leveling, and the technical drainage issues so you don’t have to worry about your patio sinking after the first summer storm. We know Gilbert soil, and we know how to build on it.
Whether you are ready to overhaul your entire backyard or just need some advice on where to start, give us a shout. We’d love to help you figure it out.
Call us today at 480-534-9680

