
Tackling a DIY paver project can seem daunting, especially when you’re unsure where to start. At Gilbert Paver Company, we understand the challenges homeowners face and are here to provide you with the guidance you need. Whether you’re sprucing up your backyard or creating a new patio, this blog is designed for homeowners like you, filled with easy-to-follow tips for a successful installation.
Contents
Planning Your Paver Project
Before diving into your Paver Installation, careful planning is essential. Begin by determining the space you want to enhance and envision how the pavers will transform your outdoor area. Consider the usage and aesthetic you desire, ensuring it meets both functional and visual needs.
Measure the area accurately to avoid purchasing too few or too many materials. Sketch a basic layout to help visualize the placement of your pavers. This initial step sets the foundation for an organized and efficient project.
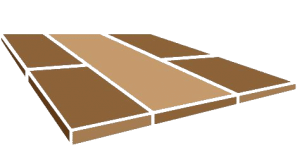
Choosing the Right Pavers
With a variety of paver options available, selecting the right type for your project is crucial. Consider factors such as durability, style, and climate suitability before making a decision. For our local climate, opt for pavers that can withstand intense sunlight and occasional heavy rains.
The color and texture of your pavers should complement your home’s exterior and landscape. It’s essential to pick a style that resonates with your personal taste while enhancing your property’s curb appeal.
Calculating Materials Needed
Proper calculation of materials will save you time and money. Start by measuring the square footage of your area and add an additional 5-10% to accommodate any cutting and shaping. Ensuring you have enough materials prevents the hassle of mid-project shortages.
Don’t forget to account for base materials, such as sand and crushed stone, which are vital for creating a sturdy foundation. Being prepared with the right materials facilitates a smoother installation process.
Preparing the Site for Installation
Site preparation is a critical step that ensures the longevity of your paver installation. Begin by clearing the area of debris, rocks, or any existing structures. Excavate the site to the necessary depth, considering the thickness of your base and pavers.
Install edge restraints to maintain the integrity of your design and prevent shifting. This preparation aids in maintaining a professional, polished appearance after the project is complete.
Laying the Base
A stable base is the backbone of your paver installation. Spread a layer of crushed stone to fill the excavated area, and compact it thoroughly to create a solid foundation. This step is vital for preventing sinking or unevenness over time.
Next, add a layer of sand and level it meticulously. Utilize a screed board to achieve a smooth, even surface, providing the perfect setting for your pavers.
Placing the Pavers
With your base ready, it’s time to lay the pavers. Start at a corner or along a straight edge to maintain alignment. Lay each paver closely, but be careful not to slam them into place, as gentle handling prevents damage.
Regularly check for uniformity in spacing and ensure you follow your planned design. Use a rubber mallet if adjustments are necessary to keep everything in line and tight.
Cutting Pavers
Occasionally, you’ll need to cut pavers to fit your design. Equip yourself with the right tools such as a masonry saw or a chisel and hammer for smaller adjustments. Safety goggles and gloves are also essential for protection.
Measure precisely before making cuts to ensure a perfect fit. This attention to detail will ensure your project looks professional and well-crafted.
Filling the Joints
Once your pavers are in place, filling the joints is the next step. Spread polymetric sand or regular joint sand over the surface, sweeping it into the crevices between the pavers. This process helps lock the pavers in position and inhibits weed growth.
After filling the joints, use a plate compactor to settle the sand deeply. Repeat this process if necessary to ensure a solid, interconnected surface.
Sealing Your Pavers
Sealing your pavers is an optional, yet beneficial step. A sealant enhances the color and longevity of the pavers, providing protection against stains and weather effects. If you choose to seal, ensure your surface is clean and completely dry before application.
Apply the sealer evenly and allow ample time for drying. Regular resealing can keep your pavers looking fresh and new for years to come.
DIY Paver Installation Tips
- Patience is key when laying pavers. Take your time to ensure proper alignment and spacing.
- Seek assistance if needed. Paver installation can be labor-intensive, so don’t hesitate to ask for help.
- Work in sections to maintain order. This approach helps you manage the project more effectively.
- Regularly clean your tools to optimize performance and prevent delays.
- Consider professional advice for complex designs. We’re always here to assist with expert guidance when needed.
Conclusion
By following these helpful tips, you’re on your way to a successful DIY paver installation that will enhance your home’s outdoor beauty. For further assistance, Contact Us by phone at 480-534-9680 or Request a Free Quote today!


