
Are you tired of staring at that lackluster backyard and dreaming of a beautiful paved patio or Driveway? You’re not alone. Many homeowners find themselves in your shoes, but rest assured, this is a common issue that we’re here to solve. At Gilbert Paver Company, we’ve got the perfect solution for you with our easy-to-follow guide on how to install pavers like a pro. Whether you’re a DIY enthusiast or a newbie, this guide will lead you to transform your outdoor spaces and increase your home’s appeal.
Contents
- 1 Gathering the Necessary Tools and Materials
- 2 Planning Your Paver Design Layout
- 3 Preparing the Groundwork
- 4 Base Layer and Compaction
- 5 Leveling the Sand Layer
- 6 Laying Down the Pavers
- 7 Using Edge Restraints
- 8 Sealing the Paver Gaps
- 9 Top Five Tips for Maintenance
- 10 Inspecting Your Finished Paver Project
Gathering the Necessary Tools and Materials
Before diving into installation, it’s crucial to have all the right tools and materials at hand. Think of this stage as prepping your workspace and gathering your arsenal for battle. You’ll need basic tools such as a shovel, level, tamper, and a concrete saw. Additionally, don’t forget the all-important pavers, sand, and gravel for the base. Take a little time to stock up on these essentials and you will create a smoother workflow. Remember, preparation is key.
The materials you select can significantly impact the final look and durability of your project. Gravel and sand create a sturdy base, while pavers available in various styles and materials will define the final aesthetic. Consider your home’s exterior and choose stones that complement your architecture.
Planning Your Paver Design Layout
Designing your paver layout isn’t just a matter of aesthetics. Although it is fun to imagine how beautiful your outdoor space will look, consider factors such as drainage, symmetry, and functionality. A well-thought-out plan can save you from future headaches. Visualize different patterns, like herringbone or basket weave, that can add an artistic flair to your space.
Furthermore, don’t hesitate to draw up sketches or use design software to virtually experiment with your layout ideas. This step adds excitement and anticipation to your project, sparking your creativity and helping you envision the final result before even lifting a paver.
Preparing the Groundwork
Once you’ve got your design layout, it’s time to break ground. Start by marking off the area where your pavers will be installed. This will be your guiding border throughout installation and ensures your design flows smoothly. Next, measure the area and dig to a depth that allows your pavers and base to fit snugly.
Ensuring proper depth is crucial, and it includes the height of your pavers plus about four to six inches for a compacted base. This depth helps with stability and water drainage, critical factors for preventing paver displacement over time.
Base Layer and Compaction
This section is the backbone of your project. Think foundation strong like concrete but made from compacted gravel. Spread your gravel evenly, ensuring that it’s thoroughly compacted to prevent pavers from shifting later. A solid base translates to even, long-lasting pavers.
Take this opportunity for a little stress relief by tamping down the base layer. The satisfaction from that compacted gravel crunch underfoot will only be rivaled by seeing your finished paver project. Remember, a solid base is what separates a professional-look from DIY-gone-wrong.
Leveling the Sand Layer
Now comes the art of leveling the sand. Spread about an inch of sand over your compacted gravel base to create a gentle cushion for your pavers. This step looks straightforward, but achieving evenness will set you apart as an amateur or as someone who can install pavers like a pro.
Employing a straight edge, such as a 2×4 plank, to help you screed the sand ensures a smooth, even layer. Taking your time to perfect this layer will pay off as you begin laying your pavers, making your job easier and end result more professional.
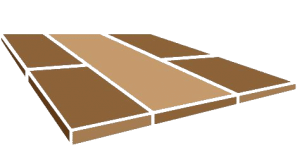
Laying Down the Pavers
At long last, you’re ready to place your pavers! If you’ve followed all prior steps, this part will be like putting together a giant jigsaw puzzle. Start by setting your pavers from one corner and move outward. Ensure they sit tightly against each other, yet not so tight that they can’t settle naturally over time.
Pace yourself and check your work regularly with a level. This checks alignment and evenness as you progress. Take short breaks to step back and admire your progress; this small boost in motivation keeps you focused and more likely to complete the task at hand.
Using Edge Restraints
To prevent your paver masterpiece from shifting, use edge restraints. These are like the unsung heroes of your paving project—small but mighty. While they might seem insignificant at first glance, they play a critical role in maintaining the structure and integrity of your hard work.
Edge restraints lock your pavers in place, and by securing the border, they prevent gradual shifting from weather or usage. Take care to anchor them well using stakes at regular intervals. A little extra security goes a long way in maintaining that professional, finished look.
Sealing the Paver Gaps
Ensuring those pavers stay locked into place involves sealing the gaps between them with sand. Sweep polymeric or joint sand across the surface to fill these joints securely, imparting both strength and safety. This sand acts like the glue holding your jigsaw puzzle together.
After spreading the sand, it’s wise to tamp the pavers to settle the material further, filling any lingering voids. Water this layer lightly so that the sand can harden into place, adding an extra layer of stability to your project.
Top Five Tips for Maintenance
- Regular Sweeping: Extend the life of your pavers by regularly sweeping away debris and dirt that can accumulate and cause staining.
- Seal Your Pavers: Shield your hard work by applying a sealant once every two to three years to protect against weather and wear.
- Addressing Stains Quickly: Quickly tackle any stains caused by spills or leaks to prevent long-term damage using appropriate cleaning agents.
- Maintain the Joint Sand: Inspect the joint sand occasionally and refill as necessary to prevent water from undermining your beautiful project.
- Take Care When Shoveling Snow: If living in snowy areas, use a plastic shovel to remove snow so as not to scratch the surfaces.
Inspecting Your Finished Paver Project
Finally, it’s the moment of truth—take a step back and inspect your completed paver project. Look for consistent patterns, level surfaces, and properly filled joints. If anything looks amiss, better to adjust now and ensure perfection.
Admire what you’ve accomplished by learning how to install pavers like a pro. With guidance from Gilbert Paver Company, you have turned your outdoor space from ordinary to extraordinary, showcasing your knack for home improvements.
Are you ready to embark on your paving journey? Connect with us at Gilbert Paver Company today by phone 480-534-9680 or Request a Free Quote.


