
Looking to enhance your home’s curb appeal and stand out in the neighborhood? A beautifully installed paver Driveway by Gilbert Paver Company might be just what you need! We’ve got the insider tips to help you achieve a stunning driveway that will not only last but also make your property shine. Whether you’re a seasoned DIYer or a homeowner considering professional help, this guide is for you.
Contents
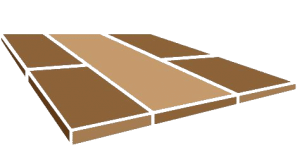
1. Choosing the Right Pavers
The first step in creating a stunning driveway is selecting the right pavers. It’s an essential decision as it impacts the overall look and durability of your driveway. With an abundant variety of colors, shapes, and materials available, you’ll surely find something that matches your home’s aesthetic.
Concrete pavers are a popular choice due to their durability and versatility. However, natural stone pavers like granite or limestone can offer a truly luxurious look. Remember, your choice should harmonize with your home’s exterior and landscaping features.
2. Preparing the Ground
Proper ground preparation is crucial for the longevity and appearance of your driveway. It involves more than just clearing the existing surface; the foundation must be carefully graded and compacted.
Begin by removing any vegetation and debris from the area. Then, excavate the ground to the necessary depth, usually around 8-12 inches. Next, grade and compact the soil to ensure proper drainage and to prevent future settling issues.
3. Setting the Base
The base is the backbone of your paver driveway. A well-laid base ensures stability and prevents shifting or cracking over time. Start by laying a geotextile fabric to separate the soil from the base material; this will prevent erosion.
Add a layer of crushed stone or gravel, typically around 4-6 inches thick. This layer needs to be properly compacted, so take your time and use a plate compactor for best results. Think of it as the strong foundation your beautiful new driveway deserves.
4. Installing Edge Restraints
Edge restraints are vital in keeping the pavers in place and maintaining the driveway’s shape over time. They provide lateral support, preventing pavers from spreading and creating gaps.
There are different types of edge restraints, including plastic, metal, or concrete. Choose one that complements your design and ensures it is securely staked into the base material.
5. Laying the Sand Bed
A sand bed creates a smooth surface for the pavers and helps lock them in place. This step requires a special type of sand known as bedding sand.
Spread a layer of sand about 1-2 inches thick over the compacted base. Then, use a screed board to level the sand, creating an even and smooth surface for the pavers to rest on.
6. Placing the Pavers
Now comes the exciting part—placing the pavers! Begin at a straight edge, like your garage or the edge of the driveway, and work your way inwards. Lay the pavers according to your chosen pattern, ensuring they fit snugly together.
Use a rubber mallet to tap each paver gently into place. This not only ensures they are securely set but also helps keep the surface level and even.
7. Cutting Pavers to Fit
In rare cases, you’ll need to cut pavers to fit the driveway’s edges or around obstacles. Don’t worry; it’s easier than it sounds!
Use a masonry saw or a chisel and hammer to cut the pavers to your desired size. Make sure to wear safety gear and take your time to achieve clean, precise cuts.
8. Finishing Touches with Joint Sand
After all pavers are laid and cut, it’s time to lock them in place with joint sand. This not only stabilizes the pavers but also prevents weed growth and insect infestation.
Spread fine sand over the entire surface and use a broom to sweep it into the joints between pavers. Then, use a plate compactor to help the sand settle and fill any gaps perfectly.
9. Sealing Your Driveway
Sealing is an optional but highly recommended step that enhances the appearance and longevity of your paver driveway. It protects against stains, weather damage, and color fading.
Apply a high-quality paver sealant evenly across the driveway, following the manufacturer’s instructions. Allow it to dry and cure completely before using your new driveway.
10. Maintenance Tips to Keep It Stunning
To ensure your driveway remains stunning for years to come, follow these maintenance tips:
- Regular Cleaning: Sweep your driveway regularly to remove dirt, leaves, and debris, which can cause stains and damage over time.
- Weed Control: Address any weed growth promptly by removing weeds and using weed control solutions to prevent their return.
- Sealant Reapplication: Reapply paver sealant every 2-3 years to maintain protection against the elements and preserve the driveway’s look.
- Spot Repairs: Fix any damaged or loose pavers immediately to prevent further issues and maintain the driveway’s integrity.
- Professional Inspection: Have a professional inspection periodically to identify and address any potential problems early on.
Your driveway is more than just a path to your garage—it’s the first impression of your home. By following these Paver Installation tips from Gilbert Paver Company, you’ll ensure it remains a stunning feature for years to come.
For professional installation or more tips, contact Gilbert Paver Company by phone # 480-534-9680 or Request a Free Quote.


