
Let’s be honest, staring out at a dusty, uninspired backyard isn’t exactly the desert oasis dream most of us had when we bought a home here in Gilbert. But upgrading your outdoor living space doesn’t have to drain your savings account or take months of chaotic construction. Honestly, creating a beautiful yard is completely doable when you focus on easy and affordable Paver Design solutions that just plain work.
Contents
- 1 The Desert Yard Dilemma: Sun, Soil, and Settling
- 2 The “Extend What You Have” Strategy
- 3 Mixing Materials: The Paver and Gravel Combo
- 4 Building a Focal Point (Hello, Fire Pit Season)
- 5 Playing with Patterns to Stretch Your Budget
- 6 The Base Makes the Space (A Quick Reality Check)
- 7 Ready to Transform Your Gilbert Yard? Let’s Talk.
The Desert Yard Dilemma: Sun, Soil, and Settling
Living in Arizona is amazing, but our yards definitely take a beating. Homeowners in Gilbert know the struggle of keeping a landscape looking fresh when the summer sun beats down for months on end. Add the heavy monsoon rains into the mix, and you have a recipe for shifting soil and frustrated homeowners.
Concrete slabs are the default builder-grade standard around here. They get poured quickly before a home is sold, and they look fine for a while. Give it a couple of summers, though, and those solid slabs inevitably start cracking. The ground beneath them shifts, the concrete expands in the heat, and suddenly your smooth patio has a jagged trip hazard right in the middle of it.
Here’s the thing about pavers: they are individual units. They are meant to move slightly. Because they flex with the soil, they are an incredibly smart choice for our specific climate. If a tree root pushes up or the ground settles, you don’t have to jackhammer a massive slab of concrete. You simply pull up a few bricks, re-level the base, and put them right back down. It sounds almost too simple, but that flexibility is exactly why concrete patio pavers save you money in the long run.
The “Extend What You Have” Strategy
You might be looking at your existing builder-grade covered patio and thinking it’s just too small for a decent grill, a table, and a place to actually sit. Most people assume they need to rip out the entire concrete slab to start fresh. You know what? You absolutely don’t.
One of the most cost-effective hardscaping tricks is a simple patio extension. We can lay a stunning paver border right up against your existing concrete to double your usable space. This gives you a custom look without the hefty demolition fees.
- The Ribbon Effect: By running a contrasting colored paver around the edge of the old concrete, you visually tie the two spaces together.
- Zoned Living Spaces: Use the existing covered patio for dining, and use the newly extended paver area for a casual lounge space with a Fire Pit.
- Seamless Transitions: We match the height perfectly. A well-executed transition makes it look like the entire space was planned that way from the very beginning.
It’s a straightforward approach. You keep the foundation you already paid for, and you just add the flavor and square footage you actually need.
Mixing Materials: The Paver and Gravel Combo
Let me explain a little secret about landscape design. You don’t have to pave every single square inch of your yard to make it look high-end. In fact, leaving some negative space actually makes the hardscape pop even more.
If you have a large side yard or a long path leading to a pool pump, solid paving might stretch the budget a bit too far. That is where the paver-and-gravel combo saves the day. By using large, oversized pavers as stepping stones spaced a few inches apart, and filling the gaps with decorative desert gravel, you create a distinctly modern, luxurious aesthetic for a fraction of the cost.
This method requires fewer materials, less intensive labor, and still delivers a striking visual impact. Plus, it provides excellent drainage during those random July downpours.
| Material Type | Visual Vibe | Budget Impact |
|---|---|---|
| Solid Brick Pavers | Traditional, clean, uniform | Moderate to High |
| Travertine Tiles | Luxury, cool to the touch, resort-style | High |
| Pavers with Gravel Gap | Modern, textured, organic | Low to Moderate |
I always tell people, if you want a magazine-cover look without the country-club price tag, mix your textures. The contrast between a smooth, engineered paver and jagged local river rock is visually fantastic.
Building a Focal Point (Hello, Fire Pit Season)
We spend a lot of time talking about the heat in Gilbert, but the winters? The winters are exactly why we all live here. Those chilly December and January nights are absolutely perfect for sitting around a fire.
If your yard feels like a massive, empty square of dirt or tired Bermuda Grass, it probably just lacks a focal point. A focal point anchors the yard. It gives the eye somewhere to land and gives your family a reason to actually go outside.
Building a circular paver fire pit is surprisingly affordable. Because the footprint is relatively small, you can often use premium tumbled stone pavers or fire-rated blocks without busting the budget. Pair a built-in fire pit with a small, semi-circular paver seating wall, and you suddenly have a dedicated destination in your backyard.
You can roast marshmallows with the kids, pour a glass of wine with the neighbors, and finally enjoy those crisp Arizona evenings. It fundamentally changes how you use your property.
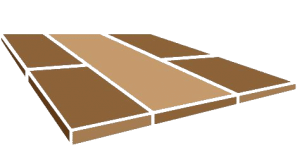
Playing with Patterns to Stretch Your Budget
Here is a fun trick. The exact same brick can look cheap or expensive depending entirely on how it is laid down. You don’t always need to buy the top-tier, imported stone to get a premium look. Sometimes, you just need a better pattern.
Standard rectangular pavers are incredibly affordable. If you just lay them side-by-side in a straight grid (what we call a running bond), they look perfectly fine. Clean, simple, and functional. But if you take those exact same affordable bricks and lay them in a herringbone pattern, the entire space instantly feels upgraded.
A herringbone pattern locks the bricks together at 45-degree or 90-degree angles. Not only does this look incredibly intricate and custom, but it is actually structurally stronger. The interlocking design prevents the pavers from shifting under heavy weight, making it ideal for driveways or high-traffic patios.
Other great budget-friendly patterns include:
- Basketweave: Pairs of bricks laid horizontally and vertically. It has a great vintage, courtyard feel.
- Ashlar Cut: Mixing different sized squares and rectangles. It mimics natural stone floors and hides dirt beautifully.
- Double Border: Using a dark charcoal brick as a frame around a lighter gray patio.
By simply changing the geometry of the layout, you elevate the entire design. It’s all about working smarter, not just buying more expensive materials.
The Base Makes the Space (A Quick Reality Check)
It is tempting to watch a few online videos and think you can knock out a paver patio over a long weekend. We totally get the appeal of the DIY route. You buy a pallet of bricks from the big box store, grab a shovel, and figure it out as you go.
But honestly? We fix a lot of DIY patios.
The heavy lifting isn’t actually laying the pavers; it’s the invisible work underneath. A lasting patio is 90% preparation and 10% finishing. If you just toss some sand on top of Gilbert clay soil and drop bricks on it, you will have a wavy, uneven mess by next spring. Weeds will shoot up through the gaps, and the edges will slowly slide away. Spending hours pulling weeds from between sinking bricks is nobody’s idea of a good time.
Professional installations rely on a very specific, layered system. We excavate the native soil. Then we bring in Aggregate Base Course (ABC)—a rough gravel mix that we compact with heavy machinery until it is harder than concrete. On top of that goes a thin layer of screeding sand to perfectly level the stones. Finally, we install rigid edge restraints and sweep polymeric sand into the joints, which hardens like mortar when wet to lock everything in place and stop weeds dead in their tracks.
The jargon might sound heavy, but the result is simple: a patio that stays flat, stays put, and looks pristine for decades. Paying for professional sub-base preparation is the ultimate affordable design solution, because doing it right the first time is always cheaper than doing it twice.
Ready to Transform Your Gilbert Yard? Let’s Talk.
Your backyard should be a place where you actually want to spend time. Whether you need a simple walkway down the side of your house, a stylish border to expand your existing patio, or a complete outdoor entertaining area, the right paver design can make it happen. You don’t need a massive budget; you just need a smart plan and a team that knows exactly how to build it.
At Gilbert Paver Company, we take pride in helping our neighbors create outdoor spaces that fit their lifestyle and their wallet. We know the local soil, we know the local HOA guidelines, and we know how to make your property look its absolute best.
Let’s skip the endless online browsing and figure out exactly what works for your specific yard. Give us a call today at 480-534-9680 to chat about your ideas, or Request a Free Quote directly through our website. We’ll walk you through all the options, share some straightforward advice, and get you one step closer to the backyard you deserve.

