
Let’s face it, staring at a patch of dirt or a cracked concrete slab in your backyard isn’t exactly inspiring, especially when the weather in Gilbert finally drops below triple digits. You want a space where you can actually relax, host a barbecue, or just sit with a coffee without staring at weeds, right?
Contents
Getting Started Without Getting Overwhelmed
Honestly, the hardest part of any DIY patio project is just figuring out where to start. You look at Pinterest, you see these massive, multi-level estates, and suddenly your modest backyard feels inadequate. But here’s the thing—you don’t need a massive budget or a degree in landscape architecture to make something cool. You just need to be smart about how you use your space.
Before you go buying pallets of stone, grab a can of marking paint. Seriously, go into your yard and spray paint the outline of where you want your patio to be. Live with it for a few days. Walk around it. Put a chair inside the lines. Does it feel cramped? Is it too close to that one neighbor who always looks over the fence?
This is called “spatial planning,” which sounds fancy, but it’s really just making sure your furniture fits before you do the heavy lifting. In Gilbert, you also have to think about the sun. If you put your patio in a spot that gets blasted by the 4 PM sun, you’re never going to use it during the summer.
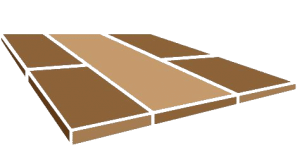
The “Mix and Match” Material Hack
A lot of homeowners think they have to commit to one single material. They think, “I’m doing a paver patio,” so they buy 800 square feet of the same gray brick. That works, sure, but it can get expensive and, frankly, a little monotonous visually.
One of my favorite design hacks is mixing materials to stretch the budget and add texture. You can create a high-end look by using premium pavers for the main seating area and then using cheaper materials, like decorative gravel or river rock, for the low-traffic zones or borders.
Think about it like this:
- Zone A (High Traffic): Use durable, flat pavers or travertine. This is where the table and chairs go.
- Zone B (Visual Filler): Use crushed granite or pea gravel. This breaks up the hard lines and drains well.
It creates this modern, intentional aesthetic that looks like you hired a designer, even though you just wanted to save money on square footage.
Material Comparison for DIYers
| Material | Cost | DIY Difficulty | Durability in AZ Heat |
|---|---|---|---|
| Concrete Pavers | Moderate | High (Labor intensive) | Excellent |
| Poured Concrete | Low/Mod | Very High (Hard to correct) | Good (Prone to cracking) |
| Crushed Gravel | Low | Low | Moderate (Needs raking) |
| Travertine | High | High | Excellent (Stays cooler) |
Cheating the Prep Work (Sort Of)
Okay, I need to be real with you for a second. There is no cheating the base prep. If you skimp on the base, your patio will look like a rollercoaster within six months. In Gilbert, we have that hard, clay-heavy soil—caliche. It’s a pain to dig through, but it actually provides a decent sub-base if it’s undisturbed.
However, there is a way to make the leveling process less of a headache. It’s called using “screed rails.”
Instead of trying to eyeball the sand level, lay down two 1-inch PVC pipes parallel to each other on top of your compacted road base. Dump your bedding sand between them, and then pull a straight board across the pipes. It creates a perfectly flat layer of sand every single time. Then you just lift the pipes, fill in the grooves, and start laying your paver stones.
It’s a simple trick that pros use to move fast, and it saves you from that constant “up and down” checking with a level.
Playing with Shapes and Angles
You know what makes a small patio look bigger? Diagonal lines.
Most people lay their pavers parallel to the house. It’s the default setting. But if you rotate your pattern 45 degrees, it tricks the eye. The lines push your vision outward toward the corners of the yard rather than straight to the back fence. It makes the space feel expansive.
If cutting pavers at an angle sounds like a nightmare (and it can be if you don’t have a wet saw), try changing the shape of the patio itself. Who says it has to be a rectangle? A curved or kidney-bean-shaped patio can soften the harsh lines of a block wall, which is pretty common in our neighborhoods.
Curvilinear designs feel more organic. They flow better with desert landscaping. Just keep in mind that curves usually require more cutting, so you have to balance the “cool factor” with how much dust you want to inhale during the cutting phase.
The “Rug” Effect
If you have a large area to cover, breaking it up is crucial. You don’t want a parking lot in your backyard; you want a living space.
A great design hack is creating a “paver rug.” This is where you use a different color or style of paver to create a border inside the main field of the patio. It visually designates a space, like an area rug does in your living room.
For example, if your main patio is a tan, textured stone, use a smooth, charcoal-colored rectangular paver to outline the dining area. It adds a layer of sophistication that costs almost nothing extra since you’re buying the stones anyway—you’re just swapping colors.
Lighting: The Invisible Design Element
You can build the most beautiful hardscape design in the world, but if you can’t see it after sunset, what’s the point? In Arizona, we do a lot of our outdoor living at night when the temps drop.
Don’t rely on that single floodlight attached to your back door. It’s harsh and casts scary shadows.
Here’s the hack: Use solar puck lights embedded in the ground or low-voltage string lights. You don’t need to be an electrician. For ground lights, you can actually leave out a half-brick here and there (or core drill if you’re feeling brave) and drop a light in.
String lights are even easier. The trick is installation height. If you hang them too low, it feels like a used car lot. Get them up high—at least 8 or 9 feet. If you don’t have trees, sink 4×4 posts into the corners of your patio design. Wrap the posts in wood slats or paint them to match your trim so they look intentional, not makeshift.
Dealing with the Edge
The edge of your patio is where failures usually start. If the edge isn’t secured, the pavers start to drift away, gaps open up, and suddenly you have a weed farm growing between your stones.
The professional way to do this is with a concrete bond beam, but that’s heavy work. For a solid DIY approach, use plastic edge restraints and 10-inch spikes. But here is the hack: cover the plastic edging with soil or sod.
Don’t leave the plastic showing. It looks cheap. Backfill dirt against the edge of the patio to hide the mechanics. It makes the patio look like it’s floating in the landscape.
Also, use polymeric sand for the joints. This isn’t just regular sand; it has polymers that activate with water to harden like a flexible grout. It stops ants, it stops weeds, and it keeps the pavers locked together. Do not skip this. Regular sand will blow away in the first monsoon storm we get.
When to Call in the Cavalry
Look, I’m all for rolling up your sleeves and getting dirty. There is a serious sense of pride that comes from standing on a patio you built with your own hands. But sometimes, the project is just bigger than a weekend warrior can handle.
If your yard has major drainage issues (like standing water near the foundation), or if you need retaining walls over two feet high, you might want to pause. Gilbert codes can be tricky regarding drainage and lot lines, and moving tons of earth by hand is backbreaking work.
Also, if you want travertine pavers, be careful. Travertine is brittle. If your base isn’t perfectly flat, the tiles will crack when you walk on them. It requires a level of precision that takes years to master.
Making It Yours
At the end of the day, your patio should be a reflection of how you live. Whether you want a Fire Pit for roasting s’mores or a quiet corner for reading, the design should follow the function.
Don’t get too caught up in being perfect. A slightly uneven paver here or there adds character (at least that’s what you can tell your spouse). The goal is to get outside and enjoy the beautiful Arizona lifestyle we pay for.
However, if you’ve read through this and thought, “You know what? I’d rather just enjoy the patio than build it,” that is totally fair. The prep work alone—excavating the dirt, hauling in tons of road base, compacting it—is grueling work.
If you have a vision for a stunning outdoor space but want to skip the backache and ensure it’s done right the first time, we should talk. We can help you navigate the materials, the layout, and the installation, ensuring you get a space that lasts for decades.
Ready to transform your backyard?
Call us today at 480-534-9680


