
Living in Gilbert means your backyard pool isn’t just a fun luxury; it is basically a necessary survival tool from May through October. But honestly, if the area around your water is cracked, faded, or burns your feet the second you step out, you are totally missing out on the full experience. Let’s talk about upgrading that space with the right pool deck pavers, so your backyard actually feels like a private desert oasis.
Contents
- 1 Let’s Be Real: Plain Concrete Just Doesn’t Cut It Anymore
- 2 What Actually Survives the Desert Sun? The Best Materials
- 3 Styles and Patterns That Will Make Your Neighbors Jealous
- 4 The Not-So-Glamorous Side: Installation Tips You Should Know
- 5 Keeping the Dust and Monsoons at Bay
- 6 Let’s Build Your Dream Pool Deck
Let’s Be Real: Plain Concrete Just Doesn’t Cut It Anymore
You know what? I see it all the time. A homeowner buys a gorgeous house, puts in a stunning pool, and then surrounds it with massive slabs of poured gray concrete. It works for a little while. But then the harsh Arizona sun beats down on it, the ground shifts, and suddenly you have an ugly crack running straight across your deck.
Here’s the thing about concrete in our area. The soil beneath our homes expands and contracts with the changing moisture levels, especially when our summer monsoons finally roll in. Poured concrete is completely rigid. When the earth moves, the slab just snaps.
Interlocking pool deck pavers handle this completely differently. Because they are individual pieces, the entire surface can slightly flex and shift with the ground. If a massive tree root decides to push up underneath your deck, you do not have to jackhammer the whole thing. You simply pull up a few stones, fix the dirt underneath, and put the pavers right back down. It is that simple.
Plus, we need to talk about the “Gilbert Shuffle.” You probably know exactly what I mean. It is that frantic, tip-toe sprint you do across boiling hot concrete to avoid burning the soles of your feet. Upgrading your decking materials can actually solve this problem and make the space comfortable to walk on, even in the middle of July.
What Actually Survives the Desert Sun? The Best Materials
Choosing the right material for your pool area is a big deal. You want something that looks incredible, sure, but it also has to withstand intense UV rays, pool chemicals, and constant foot traffic. Honestly, you have a few great options that work perfectly for Arizona homes.
The Undisputed King: Travertine Pavers
If you want to keep your feet from feeling like they are walking on a frying pan, travertine is your best friend. This natural stone reflects the sun’s rays instead of absorbing them. It literally stays cool to the touch.
Let me explain why it works so well. Travertine is extremely porous. It absorbs the cooler moisture from the earth below it, acting like a natural air conditioner for your deck. We usually recommend a tumbled finish for pool areas. The tumbling process gives the stone a slightly rough, textured grip. So, when the kids are running around soaking wet—even though you told them a hundred times not to run—they are far less likely to slip and fall.
The Heavy-Duty Choice: Concrete Pavers
Modern concrete pavers are entirely different from that boring gray slab we talked about earlier. Brands like Belgard make some incredible, high-density pavers that mimic the look of natural stone or even wood planks.
They are incredibly durable. They come in dozens of colors, shapes, and textures. You can easily find a style that matches your existing patio or the exterior of your home. Just keep in mind, darker colors will absorb more heat, so you might want to stick to lighter tans, creams, and soft grays for the pool area.
The Modern Trend: Porcelain Pavers
This one surprises a lot of people. You probably think of delicate bathroom tiles when you hear the word porcelain. However, outdoor-rated porcelain pavers are baked at incredibly high temperatures, making them dense, tough, and completely non-porous.
If you have a saltwater pool, porcelain is a massive win. Salt water can slowly eat away at natural stone if it isn’t sealed properly, but it completely ignores porcelain. It is stain-resistant, fade-resistant, and looks incredibly sleek and modern.
| Material Type | Foot-Burn Factor | Maintenance Level |
|---|---|---|
| Travertine | Very Low (Stays Cool) | Medium (Needs sealing) |
| Concrete Pavers | Moderate (Depends on color) | Low to Medium |
| Porcelain | Moderate | Very Low (No sealing) |
Styles and Patterns That Will Make Your Neighbors Jealous
Okay, so you pick your material. Now you have to figure out how to lay it down. The pattern you choose completely changes the entire vibe of your backyard.
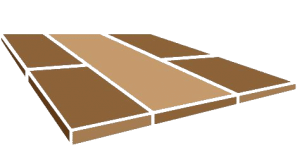
- The French Pattern (Ashlar): This is the classic choice for travertine. It uses four different sizes of stone fitted together in what looks like a random, chaotic layout. It feels very organic and natural. It completely hides minor imperfections and gives your yard an elegant, Mediterranean feel.
- The Herringbone Pattern: If you are using rectangular concrete pavers, herringbone is fantastic. The pavers are laid at 45-degree angles to each other in a zig-zag shape. Why does this matter? Well, it provides incredible structural interlocking. If you have heavy patio furniture or a lot of movement, a herringbone deck will rarely shift out of place.
- Large Format Modern: Right now, there is a huge trend leaning toward oversized, square pavers. We are talking 24×24 inch stones. It creates a seamless, minimalist look with far fewer joint lines to look at.
I always tell homeowners to look at the architectural style of their house first. A super modern, geometric house pairs beautifully with large format porcelain. A more traditional, stucco-style Arizona home begs for a tumbled travertine French pattern.
The Not-So-Glamorous Side: Installation Tips You Should Know
Installing pavers is basically just putting a giant puzzle together on the ground. Actually, let me walk that back. It looks like putting a puzzle together, but the real work happens completely out of sight. The foundation is everything. If you mess up the dirt underneath, your gorgeous new deck will look like a wavy roller coaster within six months.
If you are considering tackling this as a DIY project, you really need to understand the physical labor involved.
Step One: Digging and Grading
You have to excavate the dirt. Usually, we pull out about four to six inches of soil. Here is a crucial detail: the ground must be slightly pitched away from your pool. You want splashed water and rain to run off into the yard, not back into your clean pool water.
Step Two: The Heavy Base Layer
We lay down a compacted aggregate base. Think of it as a mixture of crushed rock and gravel. We use heavy, gas-powered plate compactors to smash this rock down until it is as hard as a highway. This step stops the ground from settling later.
Step Three: The Sand Bed and Screeding
Next comes a one-inch layer of bedding sand. We use long metal pipes and straight boards to perfectly level—or “screed”—the sand. You cannot walk on this once it is smooth.
Step Four: Laying the Stones and Cutting
You lay the pavers down gently. Around the curved edges of your pool, stones have to be custom cut. We use wet saws with diamond-encrusted blades to slice through heavy stone without cracking it.
Step Five: Locking it Together with Polymeric Sand
Once everything is placed, we sweep polymeric sand into the joints. This isn’t just regular beach sand. It is mixed with special additives. When you lightly mist it with a garden hose, it activates and hardens like a flexible grout. It stops weeds from growing up and keeps the ants from building little mountains on your deck.
Keeping the Dust and Monsoons at Bay
Our local climate throws a lot of dirt, dust, and harsh weather at our Backyards. The good news? Paver maintenance is actually pretty easy if you stay on top of a few basic chores.
You should definitely consider sealing your new deck. A good penetrating sealer soaks deep into the pores of travertine or concrete. It protects against harsh pool chemicals and makes it much easier to clean up barbecue grease spills or dropped popsicles. Honestly, you only need to reseal it every three to five years.
When those summer dust storms roll through and cover everything in a layer of brown grit, just grab your hose. You can pressure wash your deck, but be careful. Keep the pressure nozzle set to a wide fan and do not point it directly down into the joints. If you blast away the polymeric sand, you will have to sweep new sand in all over again.
Let’s Build Your Dream Pool Deck
Your backyard should be a place where you actually want to spend time. It should be a spot to relax, host weekend barbecues, and make memories without worrying about stubbed toes or burning feet.
Tearing out an old patio or putting down a brand new surface is a big project. You want it done right the very first time. Our team at Gilbert Paver Company knows exactly what it takes to build a gorgeous, durable deck that stands up to the Arizona heat and lasts for decades.
Are you ready to finally upgrade your outdoor space and get the backyard you actually deserve? We would love to chat with you about your ideas, look at your space, and help you pick out the perfect materials.
Reach out to us today to get started.
→ Call us directly at 480-534-9680
→ Or Request a Free Quote on our website to schedule your design consultation.


